
Photography 101
Metering and Exposure
So, you're familiar with taking photos and have a camera. What's next? First, locate the dial on top of your camera and switch it to M, which stands for manual control. In this mode, the camera no longer automatically adjusts exposure settings, granting you complete creative control, as we'll explain further in this post. Next, find the light meter in your camera, either by looking through the viewfinder or on the LCD screen on the back of the camera.

The meter will look something like this.
Your objective is to keep the small white rectangle below zero. If it's below the +1 or +2, your image is overexposed and will appear too bright. If it's below the -1 or -2, it's underexposed and will be too dark. This rectangle is controlled by adjusting the camera's shutter speed, aperture, and ISO, which we'll discuss below. Each setting is typically adjusted using a different dial or button on the camera, so I recommend watching a YouTube video explaining your specific camera model's layout to determine which buttons control which settings.
Aperture
The camera's aperture, also known as the camera's f-stop, is usually denoted as a number on your camera screen, such as "f/3.5" or similar. This setting is not directly related to the camera itself but instead corresponds to the lens attached to the camera.
We could delve into complex, physics-based optic lessons here, but for simplicity, let's skip that. A lens operates by having a series of triangular blades that slide over each other, forming a circle in the middle. This circle's size is the aperture of your lens. It may seem counterintuitive, but a smaller number indicates a larger hole.

Aperture illustrated.
The aperture is responsible not only for the amount of light entering the camera but also for another crucial creative aspect: controlling the depth of field or the portion of the image that is in focus. Smaller apertures, such as f/22, keep the entire image in focus, while larger apertures like f/1.8 only maintain a small area of the image in focus. Aperture also affects the bokeh, or the aesthetically pleasing blur, that is highly sought after by photographers.
Notice in the image below that the leaves are out of focus while the subject's face is in focus? This was shot at an f/3.5 aperture. If the aperture were smaller, both the leaves and the subject would be in focus. Generally, smaller apertures are used for landscape photos, and wider apertures are used for portraits. However, this can vary based on creativity and the intended purpose of the image.
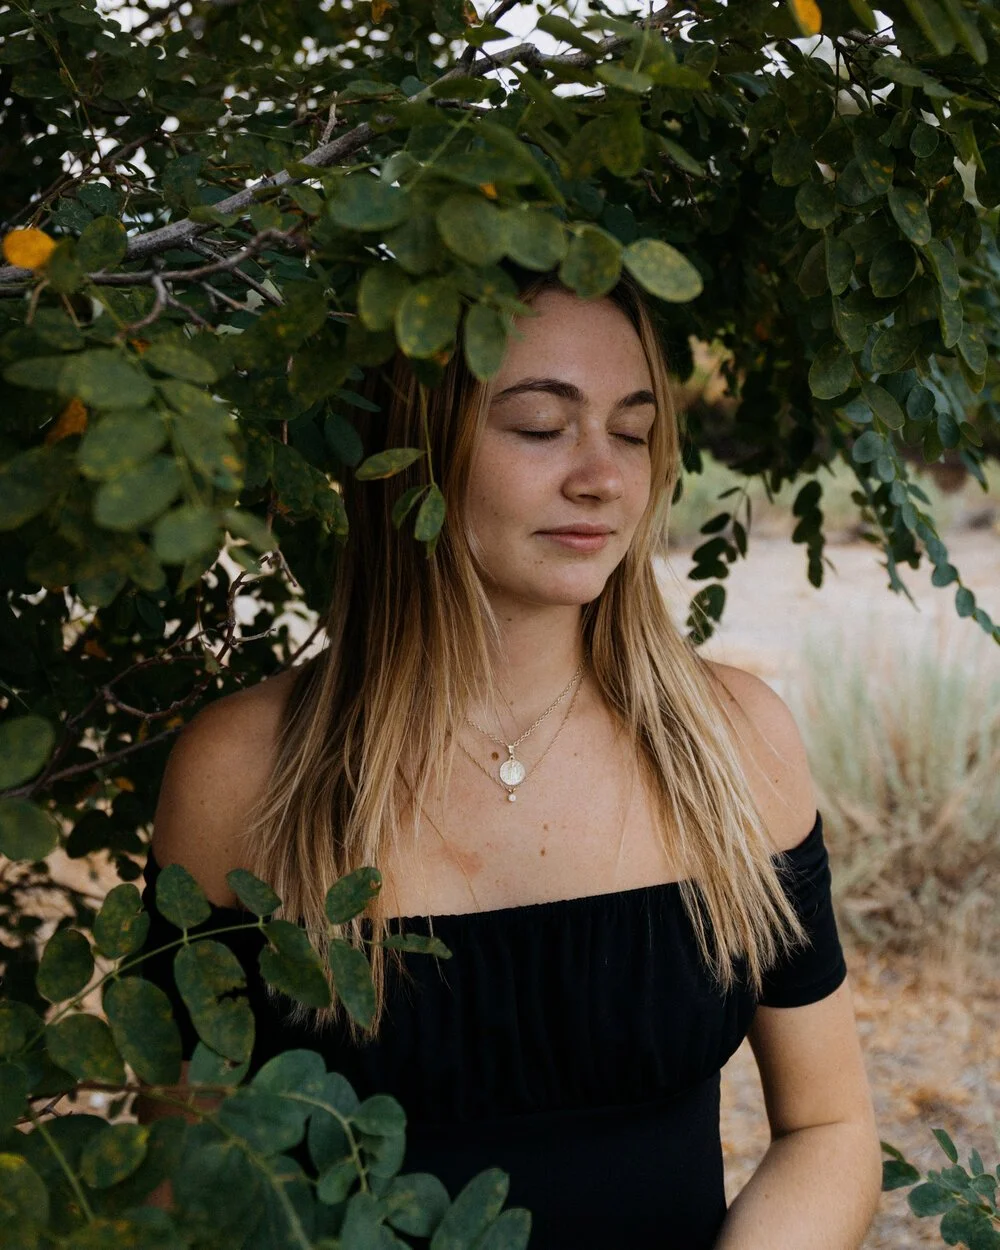
The subject is in focus but the leaves are not, illustrating a very shallow depth of field.
Shutter Speed
The next variable that you are in control of when shooting in manual mode is shutter speed. Typically shutter speed is denoted in a format that will look either like 1/500, or 2”. The unit for shutter speed is actually seconds and describes how long the image sensor of the camera is exposed to light. Imagine looking out a window with blinds. If you are the camera sensor and are set at 2”, the blinds will open for two seconds, and then close again. If it is set at 1/500, the blinds will almost instantly open and close.

Image of a camera shutter.
Aside from being responsible for the exposure of an image, shutter speed is important as it is responsible for motion and motion blur in a photo. If you are a sports photographer, you will most likely be shooting at very high shutter speeds like 1/2000 to make the images seem as they are frozen in time. The faster the shutter speed, the less motion is involved in an image. Sometimes motion in an image is a creative choice. Shooting at slow shutter speeds can leave you with blurred, dreamlike photos. You can also lock your camera off on a tripod and use a long shutter speed to get effects like the ones below.


Examples of photos taken at slow shutter speeds and the resulting creative affects.
ISO
The final variable you can control in manual shooting mode is ISO. In the era of film stock, ISO represented the film's sensitivity to light. A higher ISO generally meant you could shoot in darker conditions. The same concept applies to digital photography, but there's a caveat. ISO allows you to artificially boost the light your camera receives in situations where there isn't enough light to begin with. This is helpful when shooting at nighttime or in dark environments like concerts.

Bear in mind that pushing the ISO too high can introduce digital noise into your photos. Although digital noise can be a creative effect, it's usually better to replicate it in post-processing and avoid it in the original capture. Keep the ISO as low as possible whenever you can. This is one aspect where a newer camera may have an advantage, as modern sensors typically have a higher "usable" ISO.
Review and Notes
To summarize what we've learned so far: Set your camera in manual mode, locate the light meter, and aim to keep it at 0 for proper exposure. You can control this exposure through three settings: aperture, shutter speed, and ISO.
Aperture affects exposure and depth of field. A wider aperture results in less focus and a brighter image, while a smaller aperture leads to more focus but a darker image. Shutter speed influences exposure and motion. A shorter shutter speed produces a darker image with less motion, while a longer shutter speed captures more motion and creates a brighter image. ISO only controls exposure, but with the caveat of digital noise.
For film cameras, the process is similar, except that ISO cannot be adjusted. Another tip for proper exposure depends on what you're exposed for. When shooting digital photos, always expose for highlights. It's better for an image to be underexposed or too dark than too bright, as sensors can recover shadow data but not highlights. We'll explain this in the upcoming editing post. For film, it's better to overexpose, as film retains detail in highlights but not in shadows.
Now that you've learned this, I encourage you to continue taking photos in manual mode and adjust one setting at a time. Explore the effects of each setting. What happens when you increase the aperture? How about slowing down the shutter speed? Be sure to capture moving objects and subjects at various distances. If you have any questions, feel free to get in touch through my Instagram page linked in the top right or below.